

Page History
...
- Go to the current Tntconnect page on staffnet. If you aren't logged in to staffnet already it will take you to the login page first.
https://www.gcmapp.net/staffnet/mtd/datasync.aspx - Click on the “DataSync File” button to download your personal Tntconnect DataSync file. This file is created the moment you click the button and is a personalized data file for you. It will always have the most up to date data on gifts and donors that Reliant has.
Unlike Existing Tntconnect User Initial Datasync, for ongoing DataSyncs we DO recommend allowing automatic tasks. So, essentially, nothing to do here, proceed onward.
- Just like before, let's import the DataSync file! If you need reminding on how to do that we're happy to help. If your Tntconnect installation was associated with .tntmpd file types, you can simply double click the downloaded file. Otherwise, in the Tntconnect program, click on Tools (in the top menu bar) and select “Address and Gift Import from File,” and browse to your downloaded file [Figure 3].

Figure 3 – Address and Gift Input from File - You might be prompted to find the matching country from a drop down. Select the correct option and click “OK” [Figure 4].
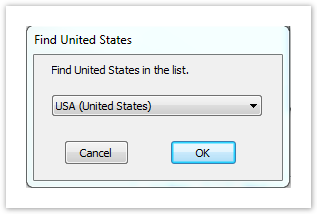
Figure 4 – Find Country Window - Tntconnect will analyze the DataSync file and present you with a summary view [Figure 5] which highlights the number of contacts that will be added to your Tntconnect database, the gifts associated with those contacts, the total amount of those gifts, and the dates of the oldest and most recent gifts. To sync Reliant data with your existing data, make sure you check the “Try to match new accounts with existing contacts” option. Click "Next" to dive in!

Figure 5 – DataSync Summary
...